


Ever thought of deploying your Flutter Web App to Azure App Services? You must be thinking we have other resources to do it, so why?
Hosting your web application using Azure App Service makes deploying and managing a web app much easier when compared to managing a physical server.
Before starting, If you are new at Flutter Development, you can get started here: https://flutter.dev/docs/get-started/codelab
In this article, you will:
Use Flutter Web to create a starter web application
Use the Azure portal to create an Azure App Service web app
Deploy your web application to App Service web app
Let’s begin!
Use Flutter Web to create a starter web application
To create a new Flutter project with web support you need to run the following commands to use the beta channel and enable web support:
flutter channel beta
flutter upgrade
flutter config --enable-web
Now, you can create the project as same as you do for other platforms.
Also, you need to generate a release build to deploy your web app, you can do so by the following command:
flutter build web
If you want to select between HTML or Canvaskit renderer, see this.
Use the Azure portal to create an Azure App Service web app
You might be wondering what is Azure App Service?
It is a fully managed web application hosting platform. This platform as a service (PaaS) offered by Azure allows you to focus on designing and building your app while Azure takes care of the infrastructure to run and scale your applications.
The first step in hosting your web application is to create a web app (an App Service app) inside your Azure subscription.
There are several ways you can create a web app but I’ll use the Azure portal.
Sign in to your Azure portal.
On the Azure portal menu or from the Home page, select Create a resource. Everything you create on Azure is a resource.
The portal navigates you to the Marketplace page. From here, you can search for the resource you want to create or select one of the popular resources that people create in the Azure portal.
In the left navigation panel, select Web.
In the Search box, search for Web App. The Create Web App resource page appears. Select Create.
Enter the following values for each field on the Basics tab.
Subscription: Visual Studio Enterprise Subscription. The web app you are creating must belong to a resource group. Here, you select the Azure subscription to which the resource group belongs (or will belong, if you are creating it within the wizard).
Resource Group: From the dropdown, select the resource group to which the web app will belong (or will belong, if you are creating it within the wizard). All Azure resources must belong to a resource group.
Name: *Enter a unique name. The name of your web app. This name will be part of the app’s URL: appname*.azurewebsites.net. The name you choose must be unique among all Azure web apps.
Publish: Code. The method you will use to publish your application. When publishing your application as code, you also must configure the Runtime stack to prepare your App Service resources to run your app.
Runtime stack: Node 12 LTS. The platform on which your application runs. Your choice may affect whether you have a choice of an operating system — for some runtime stacks, App Service supports only one operating system.
Select Node 12 LTS, as you’ll deploy the Flutter web app as a Node.js server.
Operating System: Linux. The operating system used on the virtual servers that run your app.
Region: *Select Central India. *The geographical region from which your app will be hosted.
Linux Plan: *Leave default. *The name of the App Service plan that will power your app. By default, the wizard will create a new plan in the same region as the web app.
Select West US or Central US in Region for free App Service Plan
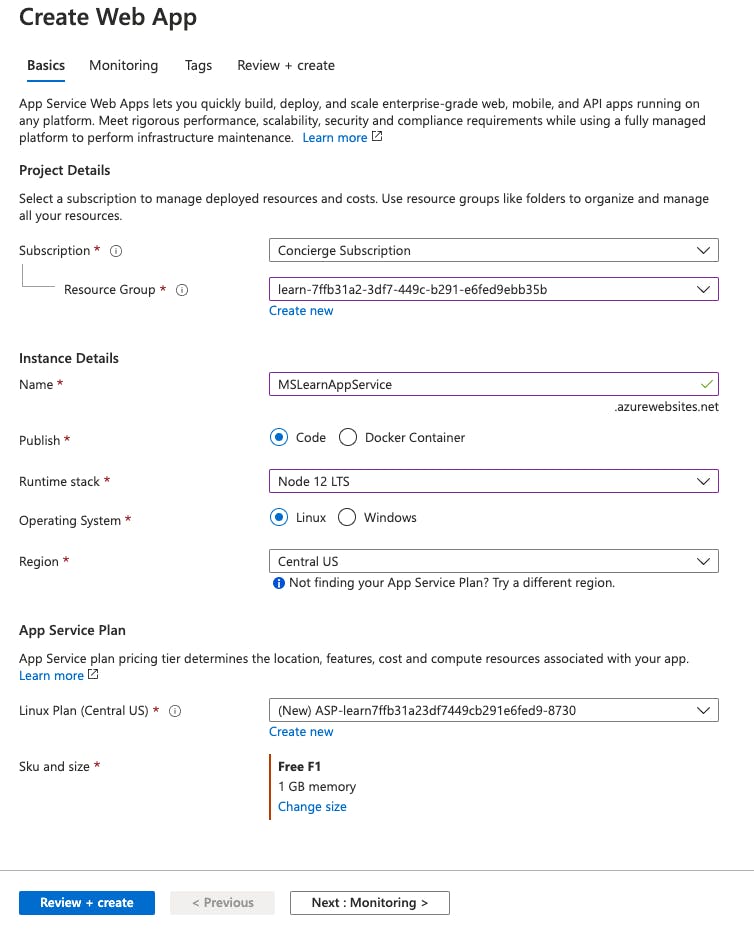
Select Review + Create to navigate to the review page, and to create the app, select Create.
Preview your web app
- After deployment completes for your app, select Go to the resource. The portal displays the web app overview page.
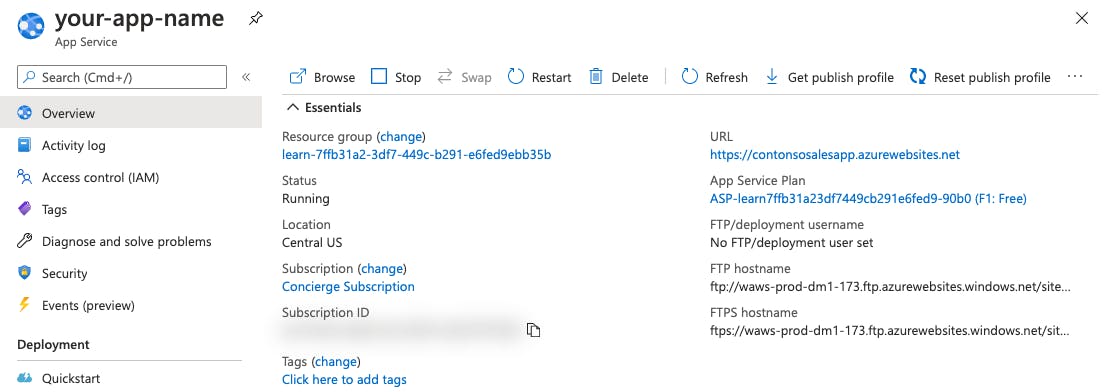
- To preview your new web app’s default content, select its URL at the top right. The placeholder page that loads indicate that your web app is up and running and ready to receive deployment of your app’s code.

Deploy your web application to App Service web app
As I mentioned before, I’ll use Flutter Web with Node.js to deploy the web app.
Note: I am not so familiar with Node 😅
- Create a new directory with your web app name and use the application generator tool,
express-generator, to quickly create an application skeleton.
$ npm install -g express-generator
$ express
Remove the public, routes, and view folder and create a folder in the root
public-flutterwhich will contain the generated release build of Flutter Web from the previous step. You can find the release build inbuild\web.Now replace the path from
publictopublic-flutterin app.js and debug the node application. You’ll see the flutter web app being deployed locally.Note: It is not mandatory to use public-flutter, you can use the default public folder also.
Now, I need to deploy the code to App Service. Azure supports automated deployment and provides you with a lot of options but I’ll use GitHub with Azure Portal. So push your code to your GitHub before deployment.
Go to your Azure App Service web app on Azure Portal from the previous step and select Deployment center in the left panel.
Select the GitHub, then authorize Azure App Service.
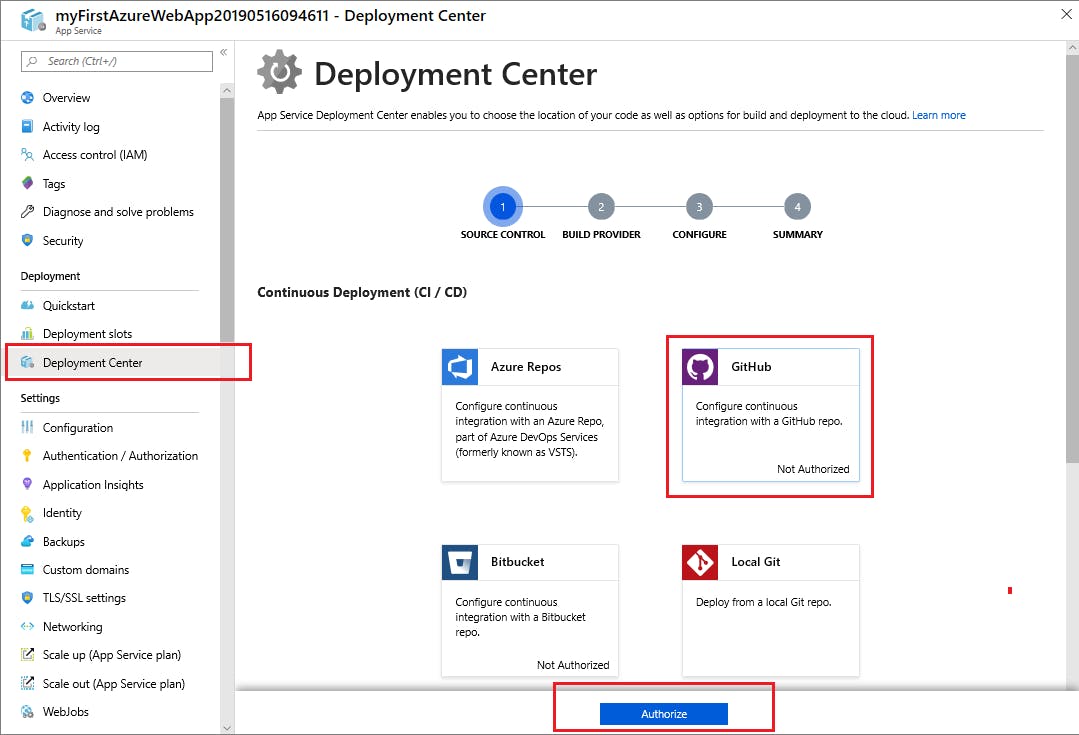
For GitHub, on the Build provider page, select App Service build service: GitHub Action.
Configure the build provider: In the Code section, select the Organization, Repository, and Branch in which you pushed the code previously and select Continue.
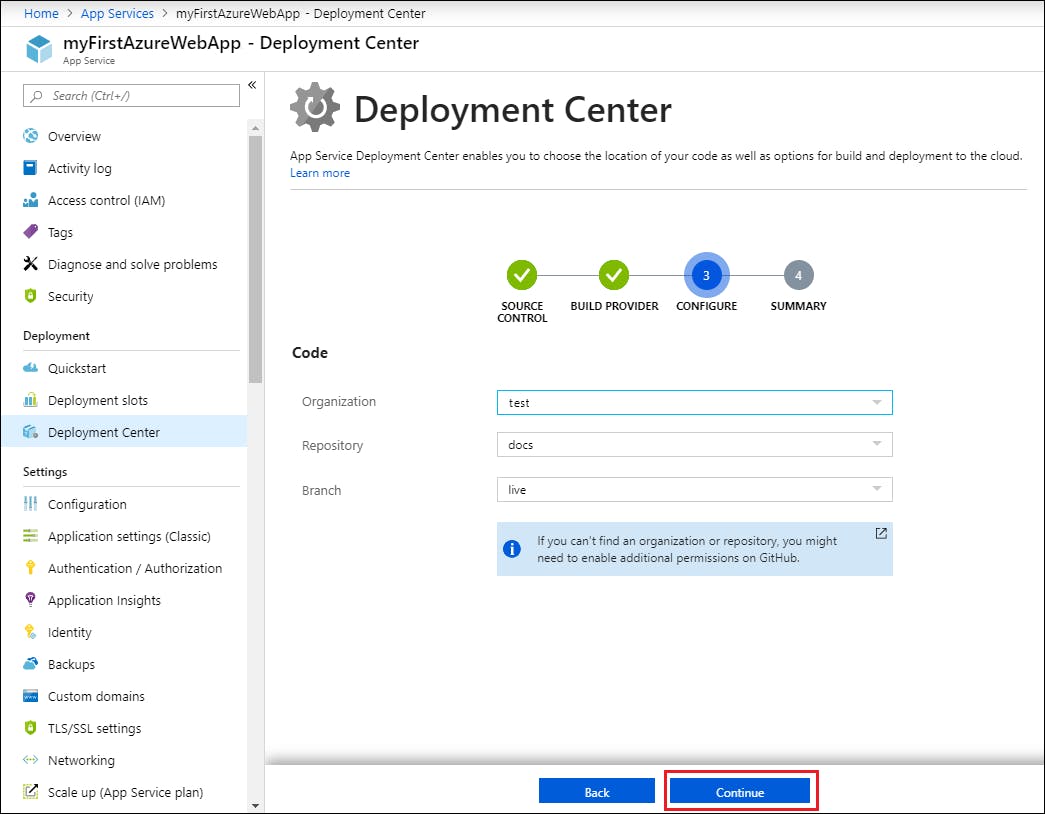
- After you configure the build provider, review the settings on the Summary page, and then select Finish.
After this, It’ll automatically create SECRETS and GitHub Action workflow in your repository and deploy the web app. Later, you just need to push the changes in the repo and it’ll deploy your app.
And you are done! Your Flutter Web App is now deployed to Azure App Service using Node.js. 🎉
Check my deployed web app: https://100daysofflutter.azurewebsites.net/
Source Code: himanshusharma89/100DaysOfFlutter
Thank you for reading, if you enjoyed the article make sure to give a clap (👏)! You can connect with me on Twitter, LinkedIn and find some of my work on GitHub and Codepen. And for more such articles you can support me by buying me a coffee

Reference:
Host a web application with Azure App Service - Learn
Running a Flutter web app and API on Node.js - LogRocket Blog